the gardener’s guide to prairie plants
Category : Guide
Prairie plants are resilient, native species that thrive in open grasslands, offering stunning beauty and low-maintenance gardening solutions. These plants attract pollinators, improve soil health, and support local ecosystems, making them ideal for eco-conscious gardeners and wildlife enthusiasts alike.
1.1. What Are Prairie Plants?
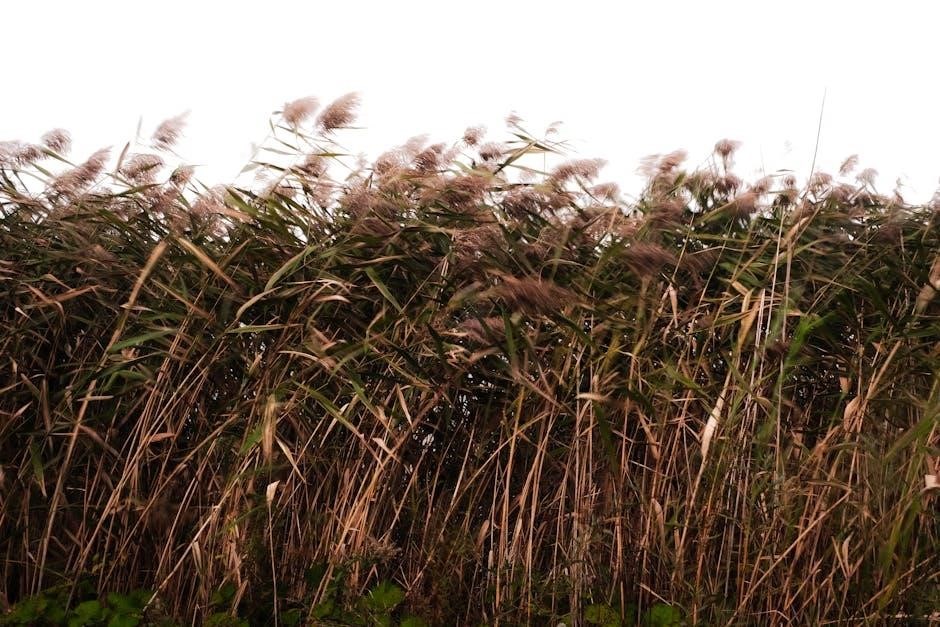
Prairie plants are native vegetation thriving in open grasslands, characterized by resilience and adaptability. They include diverse species like grasses and wildflowers, naturally occurring in regions such as the Midwest. These plants often feature deep root systems to endure harsh conditions, including extreme temperatures and droughts. As native flora, they support local ecosystems by attracting pollinators like bees and butterflies. Prairie plants are valued in eco-friendly gardening for their hardiness and low-maintenance needs, requiring minimal care and pesticides. They enhance biodiversity and offer a sustainable alternative for creating beautiful, natural landscapes. Prairie plants vary by region, adapting to different climates and soil types, making them versatile for various gardening environments.
1.2. Benefits of Growing Prairie Plants
Growing prairie plants offers numerous benefits for gardeners and the environment. These plants are low-maintenance, requiring less water and care compared to traditional garden species. They are highly drought-tolerant and can thrive in poor soil conditions, making them ideal for sustainable landscaping. Prairie plants attract pollinators like bees and butterflies, promoting biodiversity and supporting local wildlife. Their deep root systems improve soil health by preventing erosion and enhancing nutrient cycling. Additionally, they provide a natural, visually striking landscape with vibrant colors and textures, creating a dynamic and eco-friendly garden. By choosing prairie plants, gardeners can reduce water consumption, lower pesticide use, and contribute to a healthier ecosystem while enjoying the beauty of native flora.
Choosing the Right Prairie Plants for Your Garden
Assess your garden’s conditions and select prairie plants that thrive in your climate and soil type, ensuring a harmonious and resilient landscape that supports local biodiversity.
2.1. Popular Prairie Plant Species for Gardeners
Prairie gardens often feature iconic species like Black-eyed Susan and Purple Coneflower, which attract pollinators with their vibrant blooms. Little Bluestem and Big Bluestem grasses provide structural beauty, while Switch Grass adds movement with its tall, flowing plumes. For shrubs, American Beautyberry and Chokeberry offer striking berries and foliage. Vines like Clematis or Passionflower add vertical interest. These plants are resilient, drought-tolerant, and support local wildlife, making them perfect for creating a sustainable and visually stunning prairie garden. They also attract pollinators and support biodiversity, enhancing the ecosystem while requiring minimal care.
2.2. How to Select Plants Based on Your Climate and Soil Type
Selecting prairie plants begins with understanding your local climate and soil conditions. Assess your USDA Hardiness Zone to determine which species will thrive in your area. Prairie plants typically prefer well-drained soil and full sun, but some varieties tolerate shade or moist conditions. For dry soils, opt for drought-tolerant species like Blazing Star or Butterfly Milkweed. In wetter climates, Joe-Pye Weed or Ironweed are ideal. Test your soil pH and amend it if necessary, as prairie plants often prefer slightly acidic to neutral soils. Choose native species adapted to your region for optimal growth and minimal maintenance. Consult local nurseries or botanical gardens for tailored recommendations to ensure success in your prairie garden.
Understanding the Growing Conditions for Prairie Plants
Prairie plants thrive in full sun and well-drained soil, typically requiring minimal watering once established. Most species need at least six hours of direct sunlight daily.
3.1. Sunlight Requirements for Prairie Plants
Prairie plants typically require full sun to thrive, needing at least six to eight hours of direct sunlight daily. They are adapted to open grasslands, where sunlight is abundant. While some species can tolerate partial shade, they may not bloom as profusely. For optimal growth, plant them in south-facing areas with unobstructed sunlight. Avoid deeply shaded or north-facing locations, as this can lead to weak, leggy growth. Dappled shade from trees may work for a few species but is not ideal for most. Observing the natural sunlight patterns in your garden will help you choose the best location for your prairie plants. Proper sunlight ensures vibrant blooms and healthy foliage, making it a critical factor for success.
3.2. Soil Preferences and Preparation Tips
Prairie plants thrive in well-draining soil and can adapt to various soil types, including sandy, loamy, or clay-based soils. They prefer soil with moderate fertility, as overly rich soil can lead to weak growth. Before planting, test your soil to ensure it drains well and isn’t prone to waterlogging, which can harm root systems. Loosen the soil to a depth of 8-12 inches to promote healthy root development. Remove weeds thoroughly to prevent competition. If necessary, incorporate organic matter like compost to improve soil structure, but avoid over-fertilizing. Prairie plants are resilient and can tolerate some soil imperfections, but proper preparation ensures robust growth and flowering. Planting in the right soil conditions is key to their success and longevity in your garden.
3.3; Watering Needs and Drought Tolerance
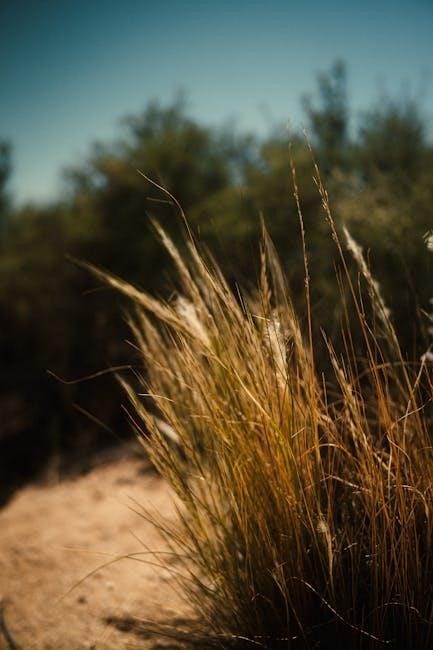
Prairie plants are known for their remarkable drought tolerance, making them ideal for water-conscious gardening. They typically require minimal watering once established, as they have deep root systems that store water. During their first growing season, regular watering is essential to help them establish strong roots. However, overwatering should be avoided, as it can lead to root rot and other issues. Mature plants can often survive with just occasional rainwater, especially in regions with adequate annual rainfall. Proper soil preparation and mulching can further enhance their ability to retain moisture. By understanding their watering needs, gardeners can enjoy thriving, low-maintenance prairie plants that add beauty and resilience to their landscapes.

Planting and Maintaining Prairie Plants
Prairie plants are resilient and adaptable, requiring well-drained soil and full sun. They are low-maintenance, support biodiversity, and need minimal upkeep once established.
4.1. Step-by-Step Planting Instructions
Planting prairie plants requires careful preparation to ensure successful growth. Start by selecting a location with full sun and well-drained soil. Prepare the area by removing weeds and loosening the soil to a depth of 8-10 inches. Space plants according to their mature size, typically 12-18 inches apart for most species. Dig holes slightly deeper than the plant’s root system, gently place the plant, and fill with soil, tamping down firmly. Water thoroughly after planting and keep the soil consistently moist during the first growing season. Mulch around plants to retain moisture and suppress weeds. Follow these steps for a thriving prairie garden;
4.2. Ongoing Care and Maintenance Tips
Ongoing care for prairie plants involves minimal yet consistent effort. Water deeply but infrequently to encourage deep root growth, reducing the need for frequent watering. Fertilization is unnecessary, as prairie plants thrive in nutrient-poor soils. Deadheading spent flowers can encourage repeat blooming. In late winter or early spring, cut back dead foliage to 3-4 inches to make way for new growth. Divide and transplant overgrown plants every 3-4 years to maintain vigor. Regularly inspect for pests and diseases, addressing issues promptly to prevent spread. Mulching around plants helps retain moisture and suppress weeds, while periodic pruning keeps the garden looking tidy and promotes healthy plant development.
4.3. Managing Weeds in a Prairie Garden
Managing weeds in a prairie garden requires a strategic approach to maintain the balance of native plants. Regularly remove invasive weeds by hand-pulling or using tools like a hoe, ensuring the entire root system is removed to prevent regrowth. Mulching between plants can suppress weed growth by blocking light and retaining moisture. Monitoring for early signs of invasive species is crucial, as they can outcompete native plants if left unchecked. Establishing a dense planting of prairie species helps shade out weeds naturally. Seasonal burns, when done safely and legally, can also control weeds and rejuvenate the prairie ecosystem. Consistent vigilance and timely action are key to maintaining a healthy, weed-free prairie garden that supports biodiversity and aesthetic appeal.
Propagating Prairie Plants
Prairie plants can be propagated through seeds, division, or transplantation. Seeds are ideal for starting new gardens, while dividing established plants ensures healthy root systems. Timing is key; propagate in spring or fall for optimal success.
5.1. How to Grow Prairie Plants from Seed
Growing prairie plants from seed is a rewarding process that requires careful preparation and patience. Start by selecting high-quality seeds from a reputable supplier, ensuring they are suitable for your climate and soil type. Prepare the soil by loosening it to a depth of 8-10 inches and incorporating organic matter like compost to improve fertility and drainage. Sow seeds in the fall or early spring, as many prairie species require a period of cold stratification to germinate. Water gently but thoroughly after sowing, and maintain consistent moisture during the germination period. Once seedlings emerge, reduce watering to avoid over-saturation. Provide full sun and avoid shading, as prairie plants thrive in open, sunny conditions. Monitor for weeds and pests, and consider using native soil to promote healthy growth. With proper care, your prairie plants will establish strong root systems and flourish over time.
5.2. Dividing and Transplanting Established Plants
Dividing and transplanting established prairie plants is a great way to share plants with friends or expand your garden. The best time to divide is in early spring or late summer/early fall, when the plants are dormant or less actively growing. Water the soil thoroughly a day before dividing to make the process easier. Use a garden fork to gently loosen the soil around the plant, then carefully lift and separate the roots. Replant the divisions in well-prepared soil, ensuring proper spacing and watering thoroughly. Keep the soil consistently moist during the first growing season to help the transplanted plants establish themselves. This method is especially effective for perennials like coneflowers or black-eyed Susans, which naturally spread over time.

Pest and Disease Management
Prairie plants are relatively pest- and disease-resistant due to their hardy nature. Regular monitoring, proper spacing, and maintaining healthy soil can prevent most issues. Common pests include aphids and spider mites, while fungal diseases may arise in moist conditions. Use organic solutions like neem oil or insecticidal soap for pests, and improve air circulation to reduce fungal risks. Encourage beneficial insects to create a balanced ecosystem, ensuring your prairie garden remains thriving and resilient.
6.1. Common Pests and How to Control Them
Prairie plants can attract pests like aphids, spider mites, grasshoppers, and root borers. Aphids can be controlled by introducing beneficial insects such as ladybugs or lacewings. Spider mites thrive in dry conditions, so maintaining adequate moisture and spraying plants with water can help. Grasshoppers can be managed by hand-picking or using organic pesticides. Root borers can be prevented by ensuring healthy soil and proper plant care. Japanese beetles, another common pest, can be controlled using neem oil or insecticidal soap. Regular monitoring and early intervention are key to preventing infestations. Encouraging a balanced ecosystem with diverse plant species also helps naturally deter pests, promoting a healthy and resilient prairie garden.
6.2. Preventing Diseases in Prairie Plants
Prairie plants are generally hardy, but diseases like root rot, powdery mildew, and fungal infections can occur. To prevent root rot, ensure well-draining soil and avoid overwatering. Powdery mildew can be controlled by providing good air circulation and spacing plants appropriately. Regularly inspecting plants for signs of disease and removing infected areas promptly helps prevent spread. Using organic fungicides or neem oil can treat mild infestations. Maintaining healthy soil through composting and avoiding synthetic fertilizers also strengthens plant immunity. Deadheading and pruning dying foliage further reduces disease risk. Encouraging beneficial insects like ladybugs and lacewings helps control pests that may weaken plants, making them more susceptible to disease. Proactive care ensures a thriving, disease-free prairie garden.

Designing a Prairie-Style Garden
Designing a prairie-style garden involves creating a natural, diverse landscape with native plants, layering grasses, and wildflowers to mimic open grasslands. Incorporate meandering paths for exploration and aesthetics, ensuring drought tolerance and low maintenance, perfect for eco-conscious gardeners seeking beauty and sustainability.
7.1. Creating a Natural and Aesthetically Pleasing Layout
Creating a natural and aesthetically pleasing prairie garden layout begins with mimicking the structure of native grasslands. Start by grouping plants in clusters, allowing for a mix of grasses and wildflowers. Consider the mature size and growth habits of each species to ensure a balanced composition. Incorporate meandering pathways to invite exploration and create visual interest. Layering plants by height and texture adds depth, while strategically placing taller species towards the back or center can frame the space. Seasonal bloom times should be staggered to provide year-round beauty. Finally, leave some areas unplanted to mimic open spaces, enhancing the natural, untamed charm of a prairie garden.
7;2. Incorporating Color and Texture in Your Design
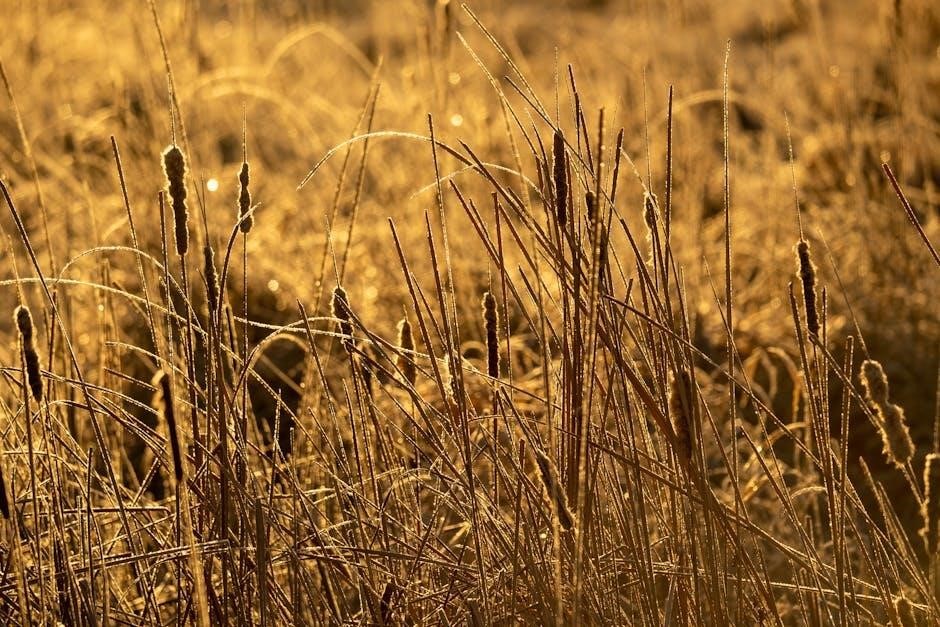
Prairie gardens offer a vibrant palette of colors and textures, enhancing their natural beauty. Choose plants with complementary bloom times to create a dynamic display of hues, from the warm yellows of coneflowers to the deep purples of ironweed. Incorporate grasses like little bluestem or switchgrass for their striking blue-gray foliage and golden fall tones. Mix delicate textures, such as the feathery plumes of fountain grass, with robust perennials like rudbeckia for contrast. Layering plants with varying heights and growth habits adds depth and visual interest. Consider seasonal changes, as textures shift from soft greens in spring to dried, structural elements in winter. This blend of color and texture creates a harmonious, ever-evolving landscape that celebrates the prairie’s natural elegance.

Attracting Pollinators with Prairie Plants
Prairie plants are vital for pollinators, offering nectar-rich blooms that attract bees, butterflies, and birds. Native species like coneflowers and black-eyed susans provide essential sustenance, supporting biodiversity and ecosystem health.
8.1. The Role of Prairie Plants in Supporting Wildlife
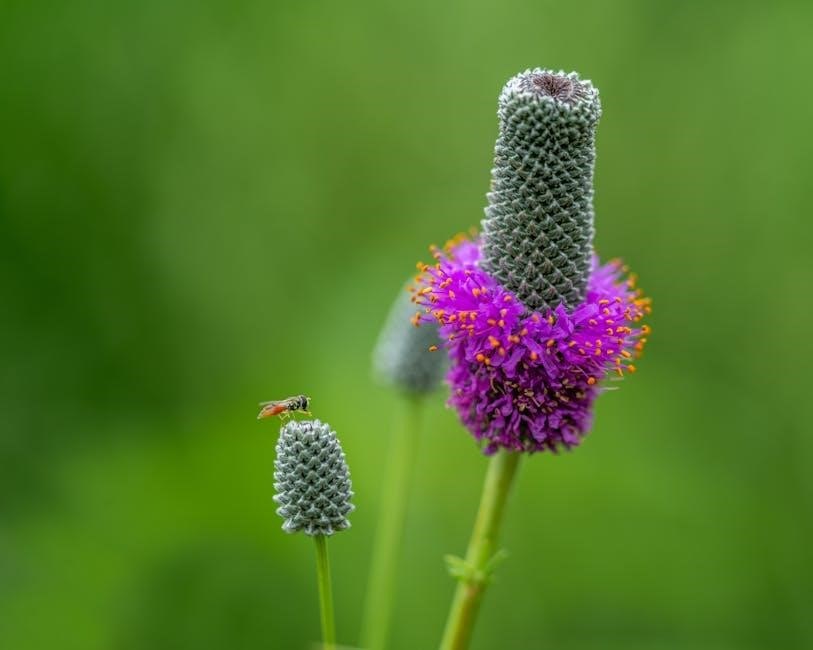
Prairie plants play a crucial role in supporting wildlife by providing habitat, food, and shelter for various species. Native pollinators like bees and butterflies rely on prairie flowers for nectar, while birds and small mammals benefit from seeds and berries. The deep root systems of prairie plants stabilize soil, creating microhabitats for insects and amphibians. Tall grasses offer shelter from predators and extreme weather, supporting biodiversity. Prairie ecosystems attract migratory species, serving as vital stopovers for birds. By planting native prairie species, gardeners contribute to wildlife conservation, fostering a balanced and thriving ecosystem that benefits both flora and fauna.
- Provide food and shelter for pollinators and wildlife.
- Support biodiversity through native plant species.
- Enhance ecosystem health and resilience.
8.2; How to Create a Pollinator-Friendly Garden
To create a pollinator-friendly garden, focus on planting native prairie species that provide nectar, pollen, and host plants for caterpillars. Choose a variety of flowers that bloom at different times to ensure a constant food source. Incorporate plants like coneflowers, black-eyed Susans, and milkweed, which are rich in nutrients for pollinators. Avoid pesticides and herbicides, as they harm beneficial insects. Provide a water source, such as a shallow dish with fresh water and rocks for landing sites. Consider adding native grasses and shrubs to create habitat diversity. By designing a garden that supports pollinators, you contribute to their survival and enhance biodiversity.
- Plant native prairie flowers for nectar and pollen.
- Incorporate host plants for caterpillars.
- Avoid pesticides to protect pollinators.
- Provide a water source for drinking and cooling.

Seasonal Care and Bloom Times
Prairie plants bloom at different times, offering vibrant displays throughout the growing season. Spring preparation involves clearing debris, while summer focuses on maintaining hydration and enjoying blooms. Fall cleanup and winter mulching protect plants, ensuring healthy regrowth.
- Spring: Clear debris and prepare soil.
- Summer: Water and enjoy blooms.
- Fall: Cut back and mulch.
- Winter: Protect with mulch.
9.1. Spring Care and Preparation
As winter fades, prairie plants begin their renewal. Spring care involves clearing debris, pruning dead growth, and dividing overcrowded plants. Prune dormant stems to ground level to promote fresh regrowth. Divide and replant established perennials to maintain vigor. Apply a thin layer of organic mulch to retain moisture and suppress weeds. Ensure soil is well-drained and enriched with compost if needed. Water thoroughly after planting but avoid overwatering; Monitor for early signs of pests or diseases. Spring is also an ideal time to assess plant placement and adjust layouts for better aesthetics or growth patterns. Proper spring preparation sets the stage for vibrant blooms and healthy development throughout the growing season.
9.2. Summer Bloom and Maintenance
Summer is when prairie plants reach their peak beauty, with vibrant blooms adding color and texture to the garden. Regular maintenance ensures they continue to thrive. Water deeply but infrequently to encourage deep root growth, avoiding overwatering, which can lead to root rot. Deadhead spent flowers to promote continuous blooming and prevent seed dispersal. Keep the area weed-free to prevent competition for nutrients. Monitor for pests like aphids and caterpillars, treating promptly if necessary. Fertilization is typically not needed, as prairie plants prefer poor to moderately fertile soil. Allow some seed heads to remain for winter interest and wildlife support. Summer is also a great time to observe and enjoy the pollinators attracted to the blooms, creating a dynamic and thriving ecosystem in your garden.
9.3. Fall Cleanup and Winter Care
Fall cleanup for prairie plants involves cutting back stems to a few inches above the ground after the first frost, removing dead plant material to prevent disease and decay. Leave seed heads intact to provide winter food for birds and small wildlife. Avoid mulching heavily, as it can retain moisture and harm the roots. Instead, apply a light layer of organic mulch, like straw, to protect the soil during the cold months. Winter care is minimal, as prairie plants are dormant and require little attention. Ensure the soil remains moderately dry to prevent rot. This period allows the garden to rest and recharge, preparing for another vibrant growing season. Proper fall cleanup ensures healthy regrowth and maintains the garden’s natural beauty year-round.
Environmental Impact of Prairie Gardens
Prairie gardens positively impact the environment by supporting local biodiversity, reducing water consumption, and promoting soil health. They create sustainable ecosystems, benefiting wildlife and combating climate change effectively.
10.1. Supporting Local Ecosystems
Prairie gardens play a vital role in supporting local ecosystems by providing habitats for native wildlife. These plants attract pollinators like bees and butterflies, essential for biodiversity. By planting native species, gardeners help restore ecosystems, ensuring species thrive in their natural environments. Prairie plants also improve soil health, reducing erosion and enhancing water retention. Their deep root systems promote nutrient cycling, benefiting the entire ecosystem. Additionally, these gardens create corridors for wildlife, connecting fragmented habitats. This supports local flora and fauna, fostering a balanced and resilient environment. Gardeners contribute to conservation efforts, preserving biodiversity and ecosystem services for future generations. Prairie gardens are a sustainable way to protect and enhance local ecosystems effectively.
10.2. Reducing Water Consumption
Prairie plants are inherently drought-tolerant, making them ideal for water-conscious gardening. Their deep root systems allow them to access moisture deep within the soil, reducing the need for frequent watering. This natural adaptation minimizes water consumption while maintaining vibrant growth. By incorporating prairie plants into your garden, you can significantly lower your water usage, especially in regions prone to dry conditions. Additionally, these plants help preserve soil moisture through their extensive root networks, further reducing the need for irrigation. This makes them a sustainable choice for gardeners seeking to conserve water while creating a beautiful, resilient landscape. Prairie gardens not only save water but also promote environmental health and resource efficiency.
Resources for Gardeners
Discover essential resources for prairie plant gardening, including recommended books, guides, and online forums. These tools offer expert advice, planting tips, and community support to enhance your gardening experience.
11.1. Recommended Books and Guides
by John Madson offers a comprehensive overview of prairie ecosystems. “Prairie Plants of the Midwest” by Floyd Swink provides detailed descriptions of native species. “Native Plants of the Midwest” by Alan Branhagen is a gardener’s guide to selecting and cultivating regional flora. Online guides like the Prairie Nursery Plant Guide and the Lady Bird Johnson Wildflower Center database are invaluable for plant identification and care tips. These resources empower gardeners to create thriving, eco-friendly prairie gardens while supporting biodiversity and local wildlife.
11.2. Online Communities and Forums
Engaging with online communities and forums is a great way to connect with fellow gardeners and experts passionate about prairie plants. Platforms like GardenWeb and Reddit’s r/PrairieGardening offer valuable discussions, tips, and resources. Facebook groups such as Prairie Plant Enthusiasts provide a space to share experiences and ask questions. Forums like Native Plant Forum and Growing Prairie Plants feature expert advice and regional insights. Many communities include photo galleries, plant databases, and event listings. These platforms foster collaboration and learning, helping gardeners refine their prairie plant care and design skills. Participating in these forums can enhance your gardening journey and connect you with a supportive network of like-minded enthusiasts.
Prairie plants offer resilience, beauty, and environmental benefits, making them a rewarding choice for gardeners. Their ability to attract pollinators and thrive in challenging conditions inspires sustainable gardening practices, transforming outdoor spaces while fostering a deeper connection with nature.
12.1. Final Tips for Success with Prairie Plants
For a thriving prairie garden, prioritize understanding your local climate and soil conditions to select the most suitable plants. Proper planting techniques, such as adequate spacing and soil preparation, ensure strong root development. Water newly planted species consistently until established, but avoid overwatering, as prairie plants are naturally drought-tolerant; Regular maintenance, like deadheading and seasonal cleanup, enhances aesthetics and promotes healthy growth. Incorporate pollinator-friendly species to support wildlife. Monitor plant health and adjust care practices as needed. Lastly, embrace patience, as prairie gardens often take time to mature. By following these guidelines, you can enjoy a vibrant, eco-friendly outdoor space that flourishes for years to come.
12.2. Encouragement to Start Your Prairie Garden Journey
Embarking on a prairie garden journey is a rewarding adventure that connects you with nature and fosters biodiversity. Prairie plants, with their resilience and beauty, offer a unique way to create a stunning outdoor space while supporting local wildlife. Don’t be intimidated by the process—start small and gradually expand as you gain confidence. The sense of accomplishment from nurturing native plants and watching them thrive is incredibly fulfilling. Remember, every garden is a learning journey, and even small steps contribute to a larger environmental impact. Take the plunge, embrace the beauty of prairie plants, and enjoy the transformative experience of cultivating a piece of natural history in your own backyard.